How to set up and use NexPos
Everything from creating your free trial to making your first sale, adding staff, running multiple branches, and reading your reports — with screenshots at every step.
Create your free trial account
No card needed. Your private shop is ready in about a minute.
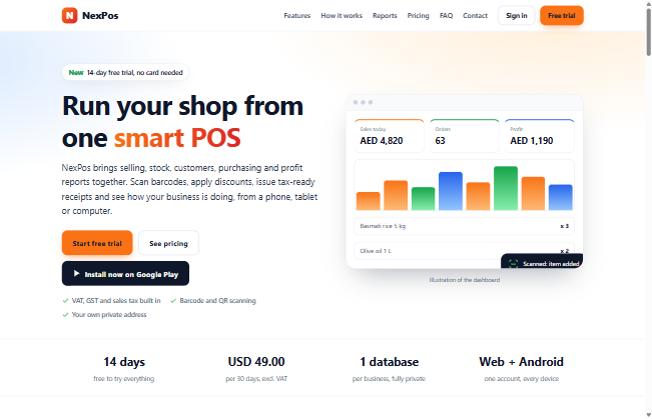
- Go to nexpos.in and click Start free trial (top right, or in the hero section).
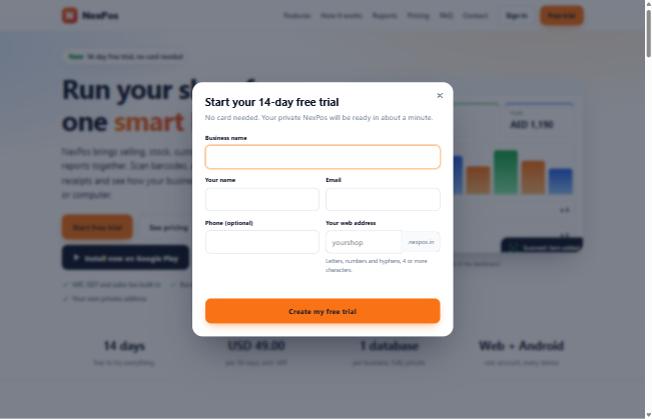
- Fill in your business name, your name, email, phone (optional) and choose your shop's web address — this becomes
yourshop.nexpos.in. - Click Create my free trial. You'll be asked to choose your own sign-in password.
- Your trial runs for 14 days with every feature unlocked — no credit card required.
Tip: one email address can only start one free trial. To continue after the trial, you simply take a paid subscription on the same shop — nothing is lost or recreated.
Sign in to your shop
Your shop has its own private address and sign-in page.
- Open your shop's address (for example
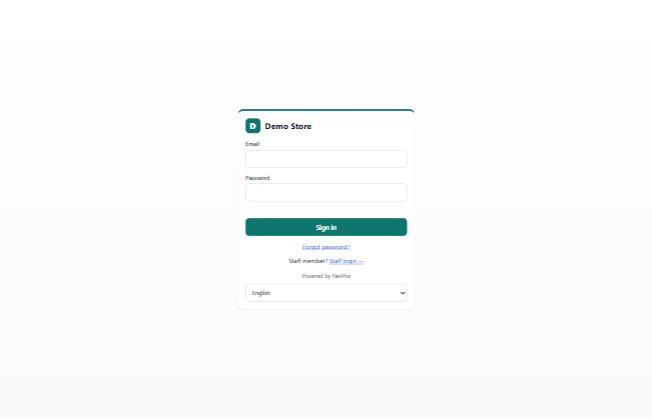
yourshop.nexpos.in) in a browser, or open the NexPos app on your phone. - Enter the email and password you chose when signing up.
- Forgot your password? Click Forgot password? and a 6-digit code will be emailed to you to reset it.
- Staff members (cashiers/managers) sign in from the same page using Staff login, or with a 4–6 digit PIN at the till.
Your dashboard at a glance
The first thing you see after signing in.
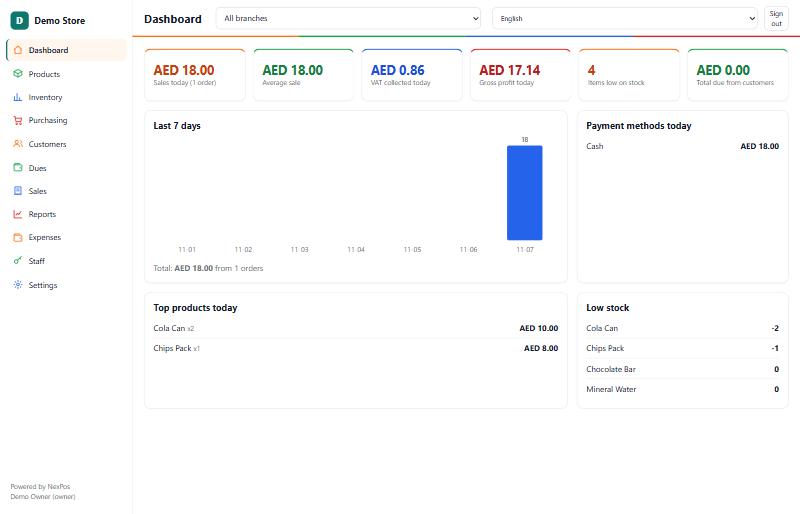
- See today's sales, average sale, VAT collected, gross profit, and items running low on stock — all in one glance.
- The branch picker at the top lets you view "All branches" or focus on just one, if you run more than one location.
- Scroll down for a 7-day sales chart, payment method breakdown, top products, and low-stock alerts.
Add your products
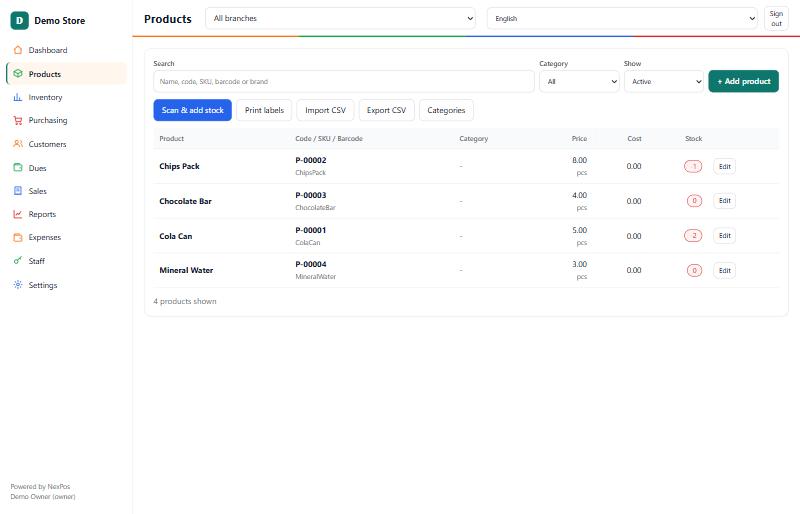
Go to Products in the left-hand menu.
- Click + Add product and enter the name, price, cost, SKU/barcode, and starting stock.
- Use Scan & add stock to quickly add stock with a barcode scanner.
- Have a lot of products already? Use Import CSV to bring them all in at once, or Export CSV to back them up.
- Running more than one branch? Each product can be set to "Every branch" or limited to specific branches — look for the Sold at option on the product form.
Add your customers
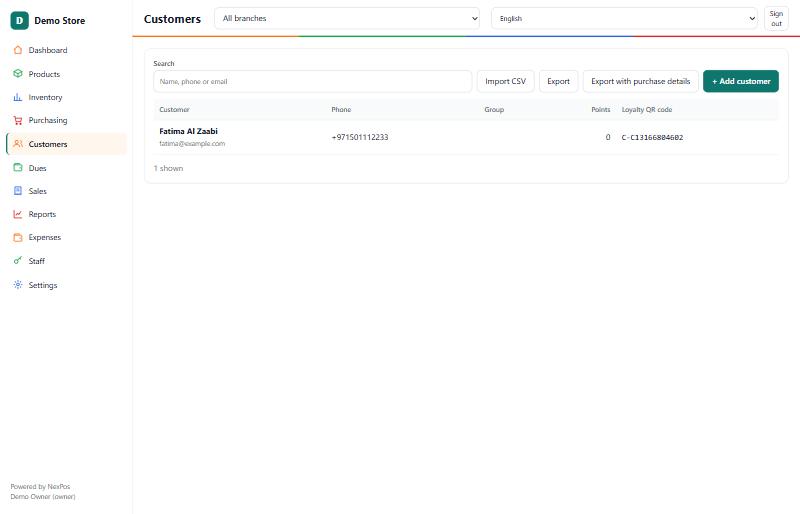
Go to Customers.
- Click + Add customer and enter their name, phone, email, and (optionally) a credit limit or payment terms for "pay later" sales.
- Every customer gets a loyalty QR code automatically — print it with Print loyalty QR card from their profile.
- Import a customer list in bulk with Import CSV.
- With multiple branches, a customer can be shared across all branches, or kept specific to one.
Add staff and set their access
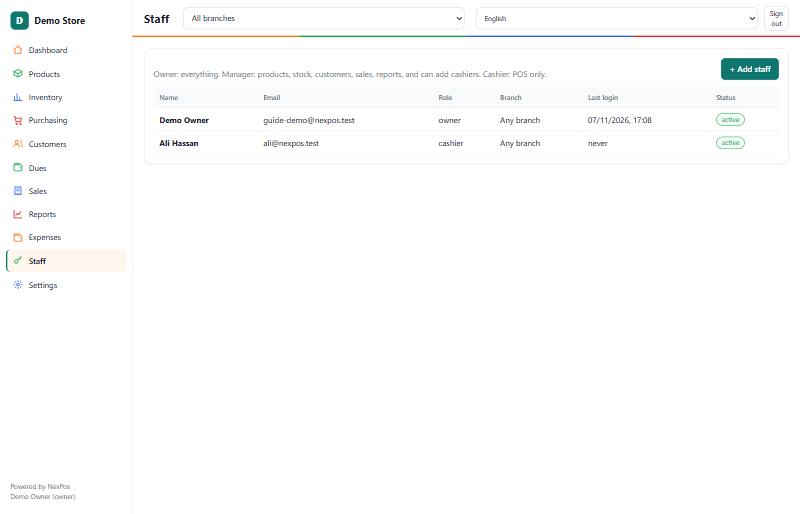
Go to Staff.
- Click + Add staff and choose a role: Owner (everything), Manager (products, stock, customers, sales, reports, and can add cashiers), or Cashier (POS only).
- Set a password for them to sign in, and optionally a 4–6 digit PIN for fast sign-in at the till.
- With more than one branch, you can pin a staff member to a specific branch — their sales, products and customers will always use that branch.
- You can disable a staff account at any time without deleting their sales history.
Make a sale at the till (POS)
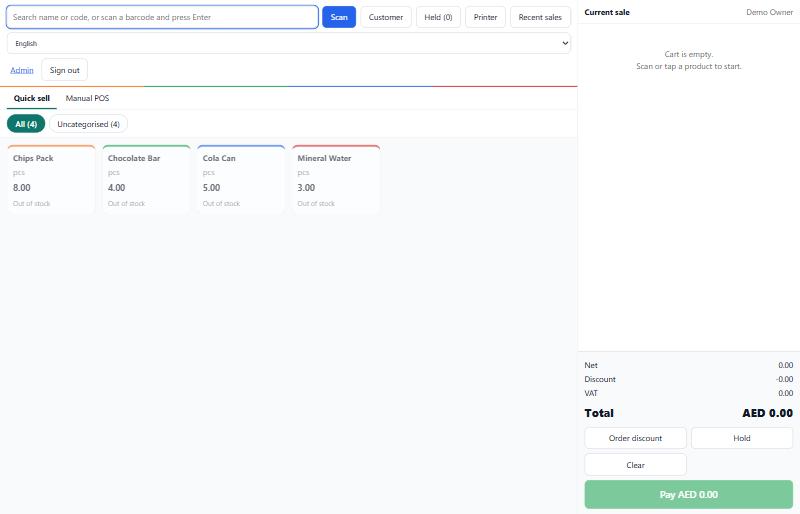
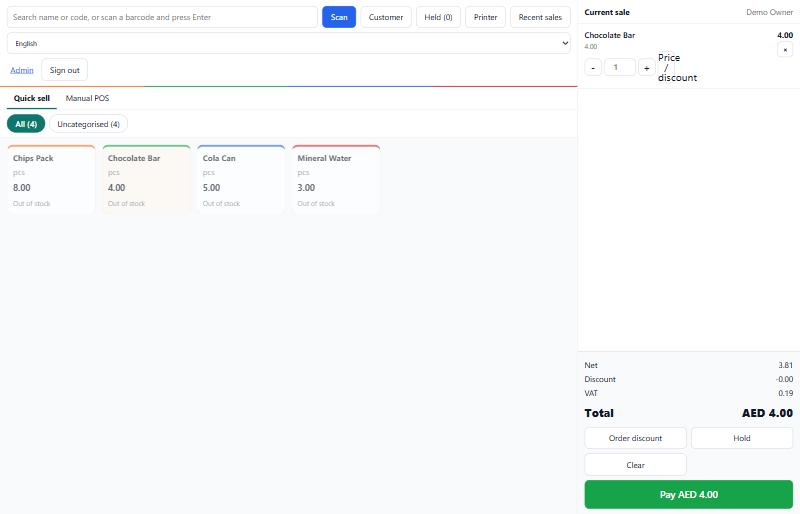
The point-of-sale screen your cashiers use all day.
- Open the POS screen and sign in (or use a PIN for fast switching between staff).
- Tap a product tile under Quick sell, or search / scan a barcode to add it to the cart.
- Attach a customer with Customer to collect loyalty points or sell on credit.
- Apply a discount with Order discount, or Hold a sale to come back to it later.
- Tap Pay, choose the payment method (cash, card, etc.), and the receipt is ready to print or send.
Check your sales and reports
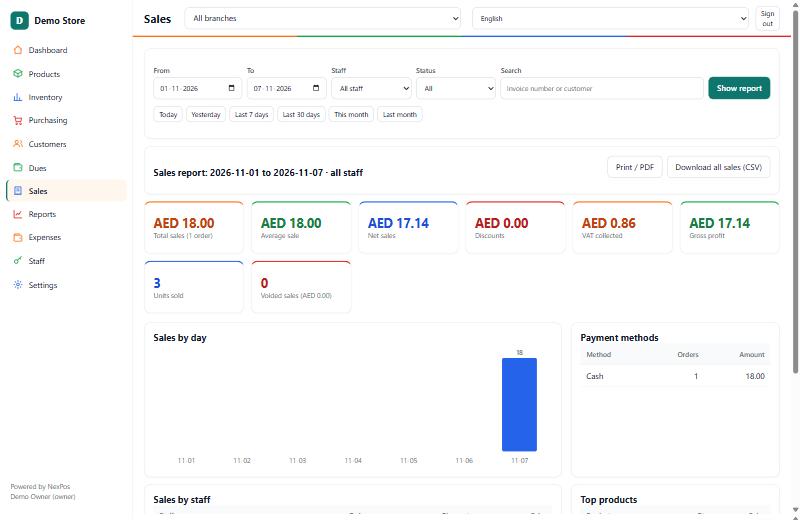
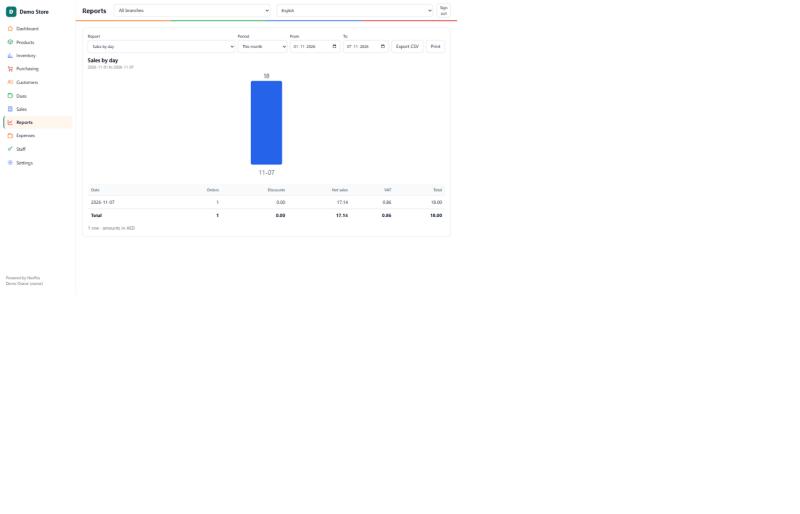
Sales shows a running report; Reports gives you deeper breakdowns.
- Filter by date range (Today, Yesterday, Last 7/30 days, This/Last month) and by staff member.
- See total sales, discounts, VAT collected, gross profit, units sold, and payment methods, with a daily sales chart.
- Under Reports, switch between report types (sales by day, by product, by staff, purchases, expenses, and more).
- Export any report to CSV, or print / save it as a PDF.
Set up more than one branch
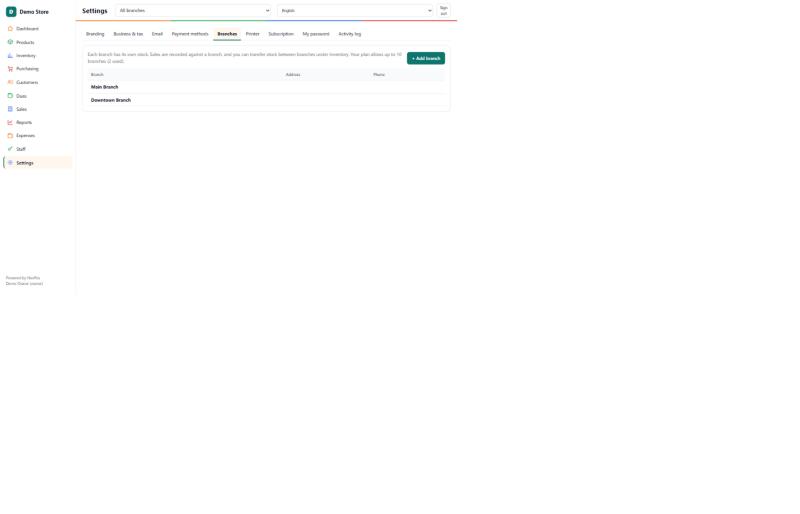
Go to Settings → Branches.
- Click + Add branch and give it a name, address and phone number.
- Each branch keeps its own stock — sales are recorded against whichever branch made them.
- How many branches you can add depends on your plan: 1 branch on Trial and Monthly, up to 10 on Half-year and Annual plans.
- Once you have more than one branch, a branch picker appears at the top of every screen so you (and your staff) can switch between them, or view all branches combined.
Manage your subscription
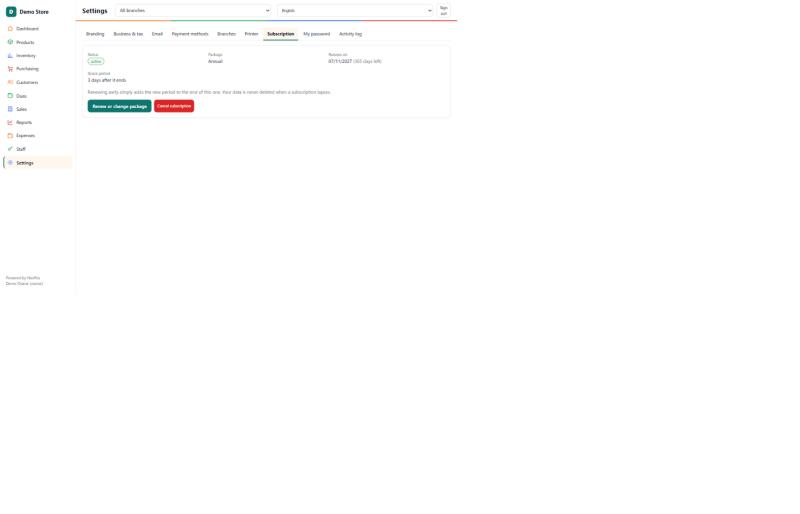
Go to Settings → Subscription.
- See your current plan, status, and renewal date at a glance.
- Click Renew or change package to switch plans or extend your subscription — renewing simply adds the new period to the end of your current one.
- If your free trial or subscription lapses, the app shows a payment reminder until you renew — your data is kept safe and is never deleted while you're inactive.
- Need to stop? Cancel subscription keeps your shop running until the end of the current period, then it simply stops — no surprise charges.
Customise branding and receipts
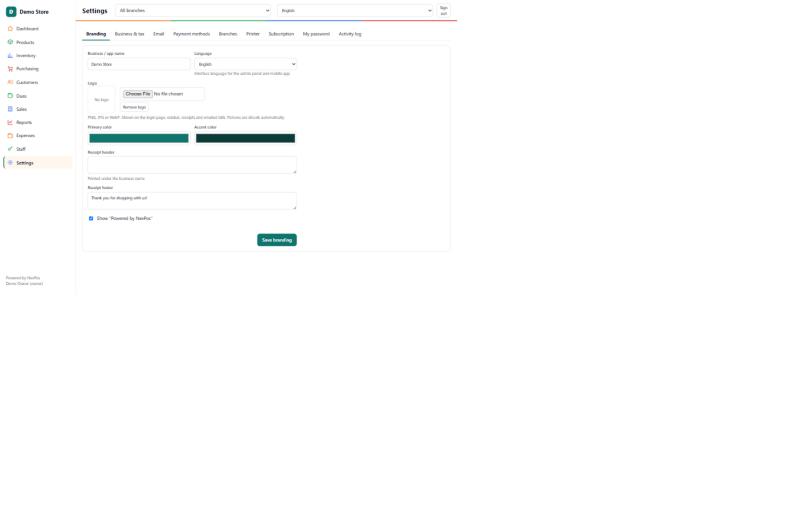
Go to Settings → Branding.
- Set your shop/app name, upload your logo, and choose your brand colours — these show on the admin panel, receipts and the mobile app.
- Add a custom receipt header and footer message (for example, a thank-you note or return policy).
- Visit the other tabs in Settings to set your tax details (VAT/GST), payment methods, printer, and preferred language.
Getting help
Still stuck? We're here.
- Use the Contact link on nexpos.in to reach our team.
- Check the FAQ section on the homepage for quick answers.
- Download the Android app from the Get the app page to run your shop from your phone, wherever you are.